Friday, April 27, 2012

Lentil "Meatballs" with Lemon Pesto

The hunt was on for a good vegetarian entree recipe. I wanted  something relatively light, not too time consuming to make and I wanted it to be pasta-free. Not that there's anything wrong with pasta.  As I've mentioned before, pasta is kind of my go-to, my default, and sometimes I have to dig a little deeper in order to get some variety in my diet. I came across this recipe for Lentil Meatballs on SproutedKitchen, which I had also pinned a few weeks ago. I checked my pantry and wouldn't you know, there, staring up at me, was a big bag of French green lentils. Dinner was on. 
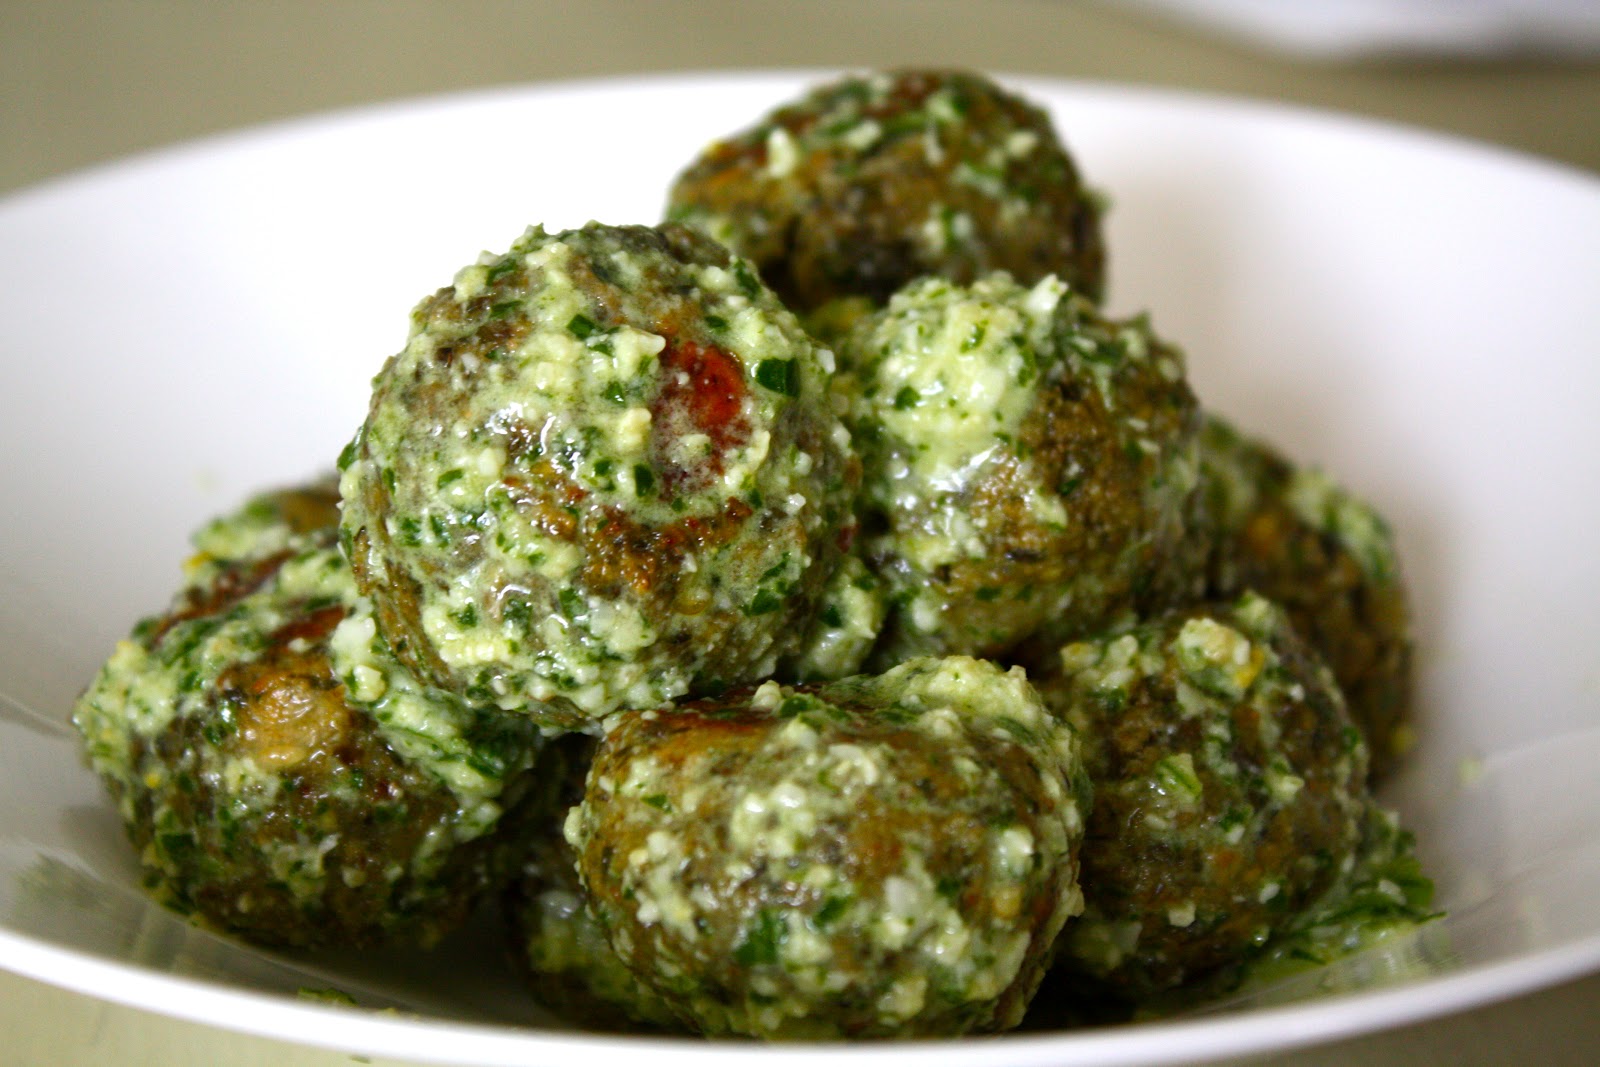
I liked the texture of these meatballs and unlike The Meatball Shop's vegetarian balls (which are awesome), these are smoother because the lentils are pureed. {The two recipes also use different ingredients and are topped with different sauces.} 
If you are someone who likes Meatless Monday this is a really nice recipe to have in your rotation. Now for me, everyday is Meatless Monday. That's because I've been a vegetarian for, I can't believe it's been so long, 26 years. I can't recall if I ever explained how I became a vegetarian on this blog, but I'll try to give you the story in a paragraph or two...
The year was 1986 and I was turning 10 years old. There were two things I wanted for my birthday-  Little Orphan Annie drapes and a dog. I really wanted a dog. I didn't care what kind or what size. A mutt from the local shelter would have done it. Now my parents are incredibly loving people, but I wouldn't say they are known for their affection towards animals. In fact my mother was terrified of dogs at that time.* And so that year, for my 10th birthday, I got two goldfish. Nary a dog in sight. 
I named the goldfish Romeo and Juliette and they lived in a little fish bowl right next to my bed. The bowl had some colored gravel, a little ceramic sign that said "No Fishin'"and a straggly weed that bobbed up and down. I loved those fish. 
After a most unfortunate accident (I filled the water up too high), Juliette died (she jumped out of the bowl). I was devastated. And I felt responsible. I sat shiva, buried her in a box in our backyard and mourned the loss. I wore black. And that was the day I decided I would never eat fish again. Meat was out of my diet a short while later. Then chicken disappeared from my diet when I was in college. 
Being a vegetarian is just how I roll. I never feel limited and I eat from almost every cuisine on the planet. But I'm not here to proselytize, so let me stop where I am...
Back to the balls. They hit the spot. The lemon pesto dressing gives the dish a really nice pop. It's a great pairing. 
So make these meatballs for Meatless Monday, or any old day...

{The Sprouted Kitchen Cookbook comes out August 28th. I can't wait to get my hands on it.}

* Postscript: I eventually adopted a wonderful Rottweiler named Omar...only 14 years after my 10th birthday. He came from the LASPCA in New Orleans. He's been with us for 13 years (knock on wood) and he is loved. 

Lentil "Meatballs" (Adapted (barely) from The Sprouted Kitchen, adapted from In Jennie's Kitchen
Serves 4, Makes 18 small balls** 
Ingredients
2 cups cooked lentils (I used about about 1 1/4 cups of dried French green lentils , put them in a medium saucepan and covered them in a few inches of cold water. I brought the water to a boil, then lowered the flame to a simmer. Cooked, partially covered, until the lentils were tender. This gave me a little bit more than 2 cups cooked.) 
2 eggs, lightly beaten
3/4 cup Ricotta
1/2 cup fresh grated Parmesan cheese
1 clove garlic, minced
1/2 teaspoon fennel seed, crushed
2 tablespoons fresh parsley, finely chopped
Hefty pinch of dried thyme
1 teaspoon each sea salt and black pepper 
2/3 cup breadcrumbs (I used Panko- Japanese breadcrumbs)
Lemon Pesto Sauce (Courtesy of The Sprouted Kitchen)

1 clove garlic
1/4 cup pinenuts 
Zest and juice of one lemon
1/2 teaspoon sea salt
1 cup packed basil leaves 
1/3 cup extra virgin olive oil
2 tablespoons grated Parmesan
2 tablespoons water to thin


Preparation

In a food processor, pulverize the lentils into mush. Put them in a large mixing bowl.
Add the beaten eggs, ricotta, parmesan, garlic, fennel seed, parlsey, thyme, salt and pepper and stir to mix well. Stir in the breadcrumbs and let the mix sit for 20 minutes.
For the pesto sauce, put the garlic, nuts, lemon zest and juice and salt in a food processor or blender and run until smooth. Add in the basil leaves and olive oil until you get a smooth, sauce-like consistency. Add water, oil or lemon juice to thin as desired. Stir in the parmesan and set aside. The sauce will keep covered in the fridge for about a week.
Preheat the oven to 400'. Check the lentil mix by rolling a 1'' round ball between your palms, it should hold together fairly well. If it seems pretty wet and it falling apart, stir in another Tbsp. or two of breadcrumbs until the ball with stay together.
Line a baking sheet with parchment paper. Roll the mix into balls and line them up on a baking sheet (they don't need lots of space between, they won't spread). If you like a bit more of a crust, brush them with olive oil.
Bake on the middle rack for 15-20 minutes until the tops are golden brown, gently turning the balls over halfway through baking. Remove to cool slightly.
Serve with your favorite noodles, on a bed of sauteed greens, or simply on their own with a nice drizzle of the pesto sauce.


** For some reason I got 25 balls out of this recipe, and because of that, I didn't have enough sauce. I divided the meatballs into two groups- the first 18 were coated with the lemon pesto and the rest were topped with my homemade marinara.  

Follow Me on Pinterest

Tuesday, April 24, 2012

Home Is Where The Heart Is: Almond Olive-Oil Cake (Torta di Mandorla)

This past weekend our very good friends moved into their new home. It's hard to convey how much I love their new abode, but I will try...
It's perfect. It's a wooden house built just after the turn of the last century. It has gorgeous molding, a built in bookcase and stunning hardwood floors- tons of  charm and character that you just don't see in generic new-builds. The rooms have tons of light. And there's an outdoor landing that's just begging for a porch swing.  The kitchen has tons of storage, great light, and it opens up into a really large garden. I haven't purchased their housewarming gift yet, but I'm feeling like a bocce ball set or a yard bowling kit might be in order.
I know Denver is nothing like New Orleans, but for some reason the Berkeley District (which is where they bought) really reminds me of my old stomping ground in New Orleans. Maybe it's the friendliness of the people. The small garden plots. The quirkiness of the place. I can't put my finger on it exactly, but my husband thought the same thing...so that confirms it.
Our friends moved in on Saturday, but no one was really relying on me to do any heavy lifting since I had Otis and Theodore to watch over. I thought a nice contribution on my part would be some homemade cake! 
I had been craving olive oil cake ever since I had some at Spuntino about a month ago. Yes, in case you are wondering, the memory of a great dessert can linger on my brain for well over 30 days. So, there I was-- determined to make an olive oil cake and searching through recipes and then I found the perfect one. It's from Gina DePalma, the brilliant pastry chef at Babbo. (She also makes one of my favorite cakes--  Zucchini Olive-Oil Cake with Crunchy Lemon Glaze. It's seriously amazing.) I found this recipe for Almond Olive-Oil cake on Serious Eats. I had a big bag of almonds in the pantry too, so that sealed the deal. 
Notes on the cake: I made my own almond flour by grinding the almonds in the food processor. I stopped pulsing them once they turned into a floury consistency. If you process them too much, the oil from the almonds can make the flour a bit clumpy...so under grind if you aren't sure. 
Notes on the glaze: I toasted the almonds in the oven for 4 minutes at 350 degrees.
Also, I didn't have any almond extract in the house (the recipe call for 1/4 teaspoon). I don't think the cake was any less delicious. There was still tons of nutty flavor. 
Enjoy!
Almond Olive Oil Cake/Torta di Mandorla (Recipe Courtesy of Gina DePalma via Serious Eats)
Ingredients
1 cup all-purpose flour
1/2 cup blanched or natural almond flour
1 1/2 teaspoons baking powder
1 teaspoon kosher salt
3 large eggs
3/4 cup granulated sugar
1/2 cup plus 1 tablespoon extra-virgin olive oil
1/2 teaspoon pure vanilla extract
1/4 teaspoon pure almond extract (I omitted this extract because I didn't have any around...)
Grated zest of 1 medium lemon or 1/4 a medium orange
1/2 cup orange juice

For Glaze:
2 tablespoons unsalted butter
1 cup confectioner's sugar
3 tablespoons whole milk
A few drops of fresh lemon juice
1/2 cup sliced, blanched almonds, toasted and cooled

Procedures
  • Preheat the oven to 350°F. Grease and flour a 9-inch round cake pan or springform pan and set aside.
  • In a medium bowl, whisk together the flour, almond flour, baking powder and salt to thoroughly combine them and set aside.
  • Crack the eggs into a large mixing bowl and whisk them lightly to break up the yolks. Add the sugar to the bowl and whisk it in thoroughly in both directions for about 30 seconds. Add the olive oil and whisk until the mixture is a bit lighter in color and has thickened slightly, about 45 seconds. Whisk in the extracts and zest, followed by the orange juice.
  • Add the dry ingredients to the bowl and whisk until they are thoroughly combined; continue whisking until you have a smooth, emulsified batter, about 30 more seconds.
  • Pour the batter into the prepared pan, and bake the cake for 30 to 45 minutes, rotating the cake pan halfway through the cooking time to ensure even browning. The cake is done when it has begun to pull away from the sides of the pan, springs back lightly when touched, and a cake tester inserted in the center comes out clean.
  • Allow the cake to cool for ten minutes in the pan, then gently remove it from the pan and allow it cool completely on a rack.
  • While the cake cools, make the glaze. Melt the butter over medium heat in a small, heavy saucepan. When the bubbles subside, lower the heat and watch the butter carefully, swirling it in the pan occasionally to distribute the heat. When the butter begins to turn a light tan color and smells slightly nutty, turn off the heat and let the butter sit. It will continue to darken as it sits.
  • While the butter cools, sift the confectioner's sugar into a medium bowl. Whisk in the milk until completely smooth but thick, then slowly whisk in the butter. Taste the glaze and add a few drops of lemon juice to balance the sweetness. Stir in the toasted almonds. Spread the almonds and glaze onto the top and sides of the cake and let it sit until set and dry.
And after having three, I mean one, slice of cake, it was time to move out. The boys started to crash and nap time was imminent. I decided to put Theo in the carrier, Otis in the stroller, and walk around this quiet residential neighborhood. Birds were chirping, the sun was out, people were hanging out on their porches drinking and conversing. And me? I just walked around thinking about how nice this place is...and thought about the time when I owned my home, in a similar kind of neighborhood, miles away, way down in New Orleans....
Now, I am not exactly an expert on Denver architecture, but I do think, that as a casual observer (and historic walking tour devotee), I can make certain generalizations about Denver's neighborhoods and their associated architectural styles. For example, Lower Downtown (LoDo) living makes me think of loft conversions and big spaces with high ceilings. Country Club and Cherry Creek conjure up stately turn-of-the-century mansions on generous plots of land. When I think of the Highlands I think of Victorian homes, modern "in-fills" and American bungalows. Capital Hill? I might say the Denver Square, also known as the Prairie House. And after walking around the Berkeley neighborhood, I think that cottages and bungalows are the most frequent styles of architecture I came across . They are cute, practical and just the right size. 
The Tennyson Street business district, which runs through the Berkeley neighborhood from 38th to 46th Avenue, has tons of great, independently owned shops. Some of my favorites include: The Bookery Nook (there's a Lik's Ice Cream parlor inside in case you are looking for a little something sweet), Mod es Tea, The Comfort Cafe and Parisi. I've drooled over the decor options at the Covered Wallpaper. And I've eaten one cookie too many (maybe not!) at Cake. Axios is on my list of places to try and I pray that My Sweet Bakery returns (it closed following a landlord dispute). There are antique shops and some consignment stores. An old-school men's barbershop called Proper. There's Hops and Pie- which serves pizza and has a beer selection that many would envy. (If you are looking for Mexican food, you've got a bunch of options on 38th Avenue right off of Tennyson.) There's a yoga studio, a super-cute baby store and some really great breakfast joints. Right... there are also a few medical marijuana boutiques on the street-- you really can't make this stuff up. Right off the strip at Tennyson and 44th Avenue is the Oriental Theater, which I went to for the first time over Earth Day weekend. Gallery and restaurant doors are open late on the first Friday of every month (Tennyson Art Walk), and there are tons of upcoming events such as A Taste of Tennyson and TotallyTennison, which benefits NW Denver Public Schools... you should stop by if you are in the hood. 
          
Follow Me on Pinterest

Sunday, April 22, 2012

Photos With The 50mm.

Pictures tell the story...

Follow Me on Pinterest

Tuesday, April 17, 2012

Inner Francophile: Spinach Quiche, Dorie Greenspan's Mustard Tart and The Yves St. Laurent Retrospective


When it was announced that the Yves Saint Laurent retrospective that wowed audiences at the Petit Palais in Paris two years ago would travel to Denver this week, and nowhere else in the United States, the question on many minds was: why Denver?
“America isn’t just New York or Los Angeles or Chicago or Boston,” said Pierre Bergé, Saint Laurent’s longtime partner in life and business and the head of the designer’s foundation. “Besides, Denver asked me. Voilà!” - New York Times, T Magazine, Blog

Looks like we moved out of Brooklyn and over to Denver at just the right time! I love museums-- permanent collections, special exhibits, retrospectives, Classical, Neo-Classical, the Classics, Abstract Expressionism, fashion, interiors and design, architecture...I love it all. So when I heard that the Denver Art Museum was the exclusive U.S. venue for the Yves St. Laurent retrospective, I was giddy with excitement. Positively giddy. G-I-D-D-Y. 
The "Big Sweep" by Claes Oldenburg and Coosje van Bruggen, outside DAM.
Feeling the spirit of YSL, I toyed with the idea of wearing a wool pants suit for my museum visit. But it was really warm that day so it didn't seem terribly practical to be donning wool. Well that, and I was heading over to the exhibit straight from the kid's playground. So there I was, at the museum's biggest fashion event, dressed rather unfashionably. But who cares, right? I was there! Yes, I was there, enjoying the exhibit, for over two hours, sans children. 
There is no photography allowed inside the venue, so you will have to take my word on this-- the retrospective was wonderful. Magnificent, really. The presentation, curation and collection were impeccable. I may have to go back one more time...
Now it doesn't take much for me to get in touch with my inner Francophile, so in honor of Yves, I decided to make two quiches this week. And get this-- I made the dough too. Oh yes. Mais oui! I rolled out some pâte brisée, which literally means "short pastry." And I did it twice. Turns out that making tart dough isn't difficult at all, you just have to be mindful that it needs to chill for three hours before you can actually use it.
I decided to go with a spinach quiche (originally from Bon Appetit Magazine) and a mustard tart (from Dorie Greenspan's tome, Around My French Table). I followed Dorie's recipe for pâte brisée as well. 
I decided to parbake both crusts for 20 minutes, with oiled foil on top (more on this below), and then let the pies bake an additional 2 minutes once the foil was removed. In retrospect, I should have let them bake a few minutes longer. I think the crust would have been a bit more flaky. That said, all in all, it was a very successful (first!) attempt at making homemade quiche. 
So here they are. I hope you enjoy the recipes. And if you find yourself in Denver before July 8th, definitely visit the Denver Art Museum's retrospective on YSL.
I'm off to channel Catherine Deneuve...and hoping that Netflix delivers Belle De Jour lickety-split.
Au revoir! 
Pâte Brisée/ Tart Dough (Courtesy of Dorie Greenspan, Around My French Table)
Yield: Makes one 9 - to 9 ½-inch tart shell
Be prepared: The dough should chill for at least 3 hours.
Ingredients
1 1/4 cups all-purpose flour
1 teaspoon sugar
1/2 teaspoon salt
6 tablespoons (3/4 stick) very cold (or frozen) unsalted butter, cut into bits
1 large egg
1 teaspoon ice water

Method
To make the dough in a food processor: Put the flour, sugar and salt in the processor and whir a few times to blend. Scatter the bits of butter over the flour and pulse several times, until the butter is coarsely mixed into the flour. Beat the egg with the ice water and pour it into the bowl in 3 small additions, whirring after each one. (Don’t overdo it — the dough shouldn’t form a ball or ride on the blade.) You’ll have a moist, malleable dough that will hold together when pinched. Turn the dough out onto a work surface, gather it into a ball (if the dough doesn’t come together easily, push it, a few spoonfuls at a time, under the heel of your hand or knead it lightly), and flatten it into a disk.

To make the dough by hand: Put the flour, sugar, and salt in a large bowl. Drop in the bits of butter and, using your hands or a pastry blender, work the butter into the flour until it is evenly distributed. You’ll have large and small butter bits, and that’s fine — uniformity isn’t a virtue here. Beat the egg and water together, drizzle over the dough, and, using a fork, toss the dough until it is evenly moistened. Reach into the bowl and, using your fingertips, mix and knead the dough until it comes together. Turn it out onto a work surface, gather it into a ball (if the dough doesn’t come together easily, push it, a few spoonfuls at a time, under the heel of your hand or knead it some more), and flatten it into a disk. 

Chill the dough for at least 3 hours. (The dough can be refrigerated for up to 5 days.)
When you’re ready to make the tart shell, butter a 9- to 9 1/2-inch fluted tart pan with a removable bottom (butter it even if it’s nonstick).

To roll out the dough: I like to roll out the dough between sheets of wax paper or plastic wrap or in a lightly floured rolling cover, but you can roll it out on a lightly floured work surface. If you’re working between sheets of paper or plastic wrap, lift the paper or plastic often so that it doesn’t roll into the dough, and turn the dough over frequently. If you’re just rolling on the counter, make sure to lift and turn the dough and reflour the counter often. The rolled-out dough should be about ¼ inch thick and at least 12 inches in diameter.
Transfer the dough to the tart pan, easing it into the pan without stretching it. (What you stretch now will shrink in the oven later.) Press the dough against the bottom and up the sides of the pan. If you’d like to reinforce the sides of the crust, you can fold some of the excess dough over, so that you have a double thickness around the sides. Using the back of a table knife, trim the dough even with the top of the pan. Prick the base of the crust in several places with a fork.

Chill — or freeze — the dough for at least 1 hour before baking.

Center a rack in the oven and preheat the oven to 400 degrees. Press a piece of buttered foil (or use nonstick foil) against the crust’s surface. If you’d like, you can fill the covered crust with rice or dried beans (which will be inedible after this but can be used for baking for months to come) to keep the dough flat, but this isn’t really necessary if the crust is well chilled. Line a baking sheet with a silicone baking mat or parchment paper and put the tart pan on the sheet.

To partially bake the crust: Bake for 20 minutes, then very carefully remove the foil (with the rice or beans). Return the crust to the oven and bake for another 3 to 5 minutes, or until it is lightly golden. Transfer the baking sheet to a cooling rack and allow the crust to cool before you fill it.
To fully bake the crust: Bake for an additional 10 minutes, or until it is an even golden brown. Transfer the baking sheet to a cooling rack and allow the crust to cool before you fill it.
Storing: Well wrapped, the dough can be kept in the refrigerator for up to 5 days or frozen for up to 1 month. Although the fully baked crust can be wrapped airtight and frozen for up to 2 months, I prefer to freeze the unbaked crust in the pan and bake it directly from the freezer — it has a fresher flavor. Just add about 5 minutes or so to the baking time.

* * *

Gérard’s Mustard Tart (Courtesy of Dorie Greenspan, Printed in The New York Times, Diner's Journal
Be sure to use strong mustard from Dijon. Dorie's friend Gérard Jeannin uses Dijon’s two most popular mustards in his tart: smooth, known around the world as Dijon, and grainy or old-fashioned, known in France as “à l’ancienne.” You can use either one or the other, or you can adjust the proportions to match your taste, but whatever you do, make sure your mustard is fresh, bright colored, and powerfully fragrant. Do what Gérard would do: smell it first. If it just about brings tears to your eyes, it’s fresh enough for this tart.
Ingredients
3 carrots (not too fat), trimmed and peeled
3 thin leeks, white and light green parts only, cut lengthwise in half and washed
2 rosemary sprigs
3 large eggs
6 tablespoons crème fraîche or heavy cream
2 tablespoons Dijon mustard, or to taste
2 tablespoons grainy mustard, preferably French, or to taste
Salt, preferably fleur de sel, and freshly ground white pepper
1 9- to 9½-inch tart shell made from Tart Dough (recipe above), partially baked and cooled
Method
Center a rack in the oven and preheat the oven to 425 degrees. Line a baking sheet with a silicone baking mat or parchment paper.

Cut the carrots and leeks into slender bâtons or sticks: First cut the carrots lengthwise in half, then place the halves cut side down on the cutting board and cut crosswise in half or cut into chunks about 3 inches long. Cut the pieces into 1/ 8- to 1/4-inch-thick matchsticks. If your carrots were fat and you think your matchsticks don’t look svelte enough, cut them lengthwise in half. Cut the leeks in the same way.
Fit a steamer basket into a saucepan. Pour in enough water to come almost up to the steamer, cover, and bring to a boil. Drop the carrots, leeks, and 1 rosemary sprig into the basket, cover, and steam until the vegetables are tender enough to be pierced easily with the tip of a knife, 10 to 15 minutes. Drain the vegetables and pat them dry; discard the rosemary sprig.
In a medium bowl, whisk the eggs together with the crème fraîche or heavy cream. Add the mustards, season with salt and white pepper — mustard has a tendency to be salty, so proceed accordingly — and whisk to blend. Taste and see if you want to add a little more of one or the other mustards.

Put the tart pan on the lined baking sheet and pour the filling into the crust. Arrange the vegetables over the filling — they can go in any which way, but they’re attractive arranged in spokes coming out from the center of the tart. Top with the remaining rosemary sprig and give the vegetables a sprinkling of salt and a couple of turns of the pepper mill.

Bake the tart for about 30 minutes, or until it is uniformly puffed and lightly browned here and there and a knife inserted into the center of the custard comes out clean. Transfer the tart to a cooling rack and let it rest for 5 minutes before removing the sides of the pan.
Serve hot, warm, or at room temperature (or lightly chilled).
Serving: The tart is delicious just out of the oven, warm, at room temperature, or even slightly chilled — although that wouldn’t be Gérard’s preference, I’m sure. If you’re serving it as a starter, cut it into 6 portions; if it’s the main event, serve it with a lightly dressed small salad.
Storing: Like all tarts, this is best soon after it is made, but leftovers can be covered, chilled, and nibbled on the next day.

* * *

Spinach Quiche (Courtesy of Bon Appetit Magazine and Smitten Kitchen, with a modification or two...)
Ingredients
4 ounces of cream cheese, room temperature
1/2 cup half and half (or milk)
3 eggs
1 10-ounce package frozen chopped spinach, thawed and drained
1/2 cup grated cheddar (you could use Gruyere too)
1/4 cup grated Parmesan
3 green onions, thinly sliced 
1/4 teaspoon salt
1/4 teaspoon pepper

Preheat oven to 425°. Beat cream cheese in medium bowl until smooth. Gradually beat in half and half and eggs. Mix in remaining ingredients. Pour mixture into prepared crust. Bake until crust is golden brown and filling is set, about 25 minutes. Cool 10 minutes before serving.
Follow Me on Pinterest