
It's been almost 15 years since my mother escorted me on a 3-day road-trip from New York City to Madison, Wisconsin, which is where I originally started law school (this was long before I realized that I did not actually want to be an attorney). And it was on that road-trip that I figured out just how different we sounded from some of our Midwestern countrymen. Less me, more my mother.
My mother's accent is 100% pure Bronx. She grew up in the 1950s and 60s on the Grand Concourse (which if you're wondering, does have the second largest collection of Art Deco architecture outside of Miami). The accent is very particular and it's distinct from its more popularized Brooklyn counterpart. As for my accent, I like to think that I don't really have one. Maybe it's slightly more pronounced if I drink a few glasses of wine, or right after I've talked with my mother on the phone. But for the most part, I think that I can 'pass' as someone who is generally from the Northeast, or mid-Atlantic...unless I say the words dog, ball or coffee...
My mother's accent is 100% pure Bronx. She grew up in the 1950s and 60s on the Grand Concourse (which if you're wondering, does have the second largest collection of Art Deco architecture outside of Miami). The accent is very particular and it's distinct from its more popularized Brooklyn counterpart. As for my accent, I like to think that I don't really have one. Maybe it's slightly more pronounced if I drink a few glasses of wine, or right after I've talked with my mother on the phone. But for the most part, I think that I can 'pass' as someone who is generally from the Northeast, or mid-Atlantic...unless I say the words dog, ball or coffee...

..which brings me to Novo Coffee. They're one of the top 10 roasters in the country, and they happen to roast right here in Denver. Their coffee is served at some of the city's top restaurants, but there aren't too many places where you can buy their beans retail. So I was happy to discover that their warehouse is open on Friday between 1 and 3 pm for retail purchases. (I'd call before you go- just to confirm.)
Last month I finally found some time to check it out. I was greeted by Herb Brodsky, a co-founder of Novo. And it took me less than a minute to peg his accent...
This Bronx-born coffee roaster relocated to Denver back in 1995 and started his business shortly thereafter. But geographic kinship aside, Novo roasts some of the best beans I've ever tasted- thanks in part to their master-roaster Erich Rosenberg. My boys and I toured the facility and I schmoozed with Herb. And for a brief moment he suspected that he had dated my mother. But there were lots of ladies with the surname Goldstein in the Bronx in those days, so it was an easy mistake to make. It turns out they never dated.
This Bronx-born coffee roaster relocated to Denver back in 1995 and started his business shortly thereafter. But geographic kinship aside, Novo roasts some of the best beans I've ever tasted- thanks in part to their master-roaster Erich Rosenberg. My boys and I toured the facility and I schmoozed with Herb. And for a brief moment he suspected that he had dated my mother. But there were lots of ladies with the surname Goldstein in the Bronx in those days, so it was an easy mistake to make. It turns out they never dated.
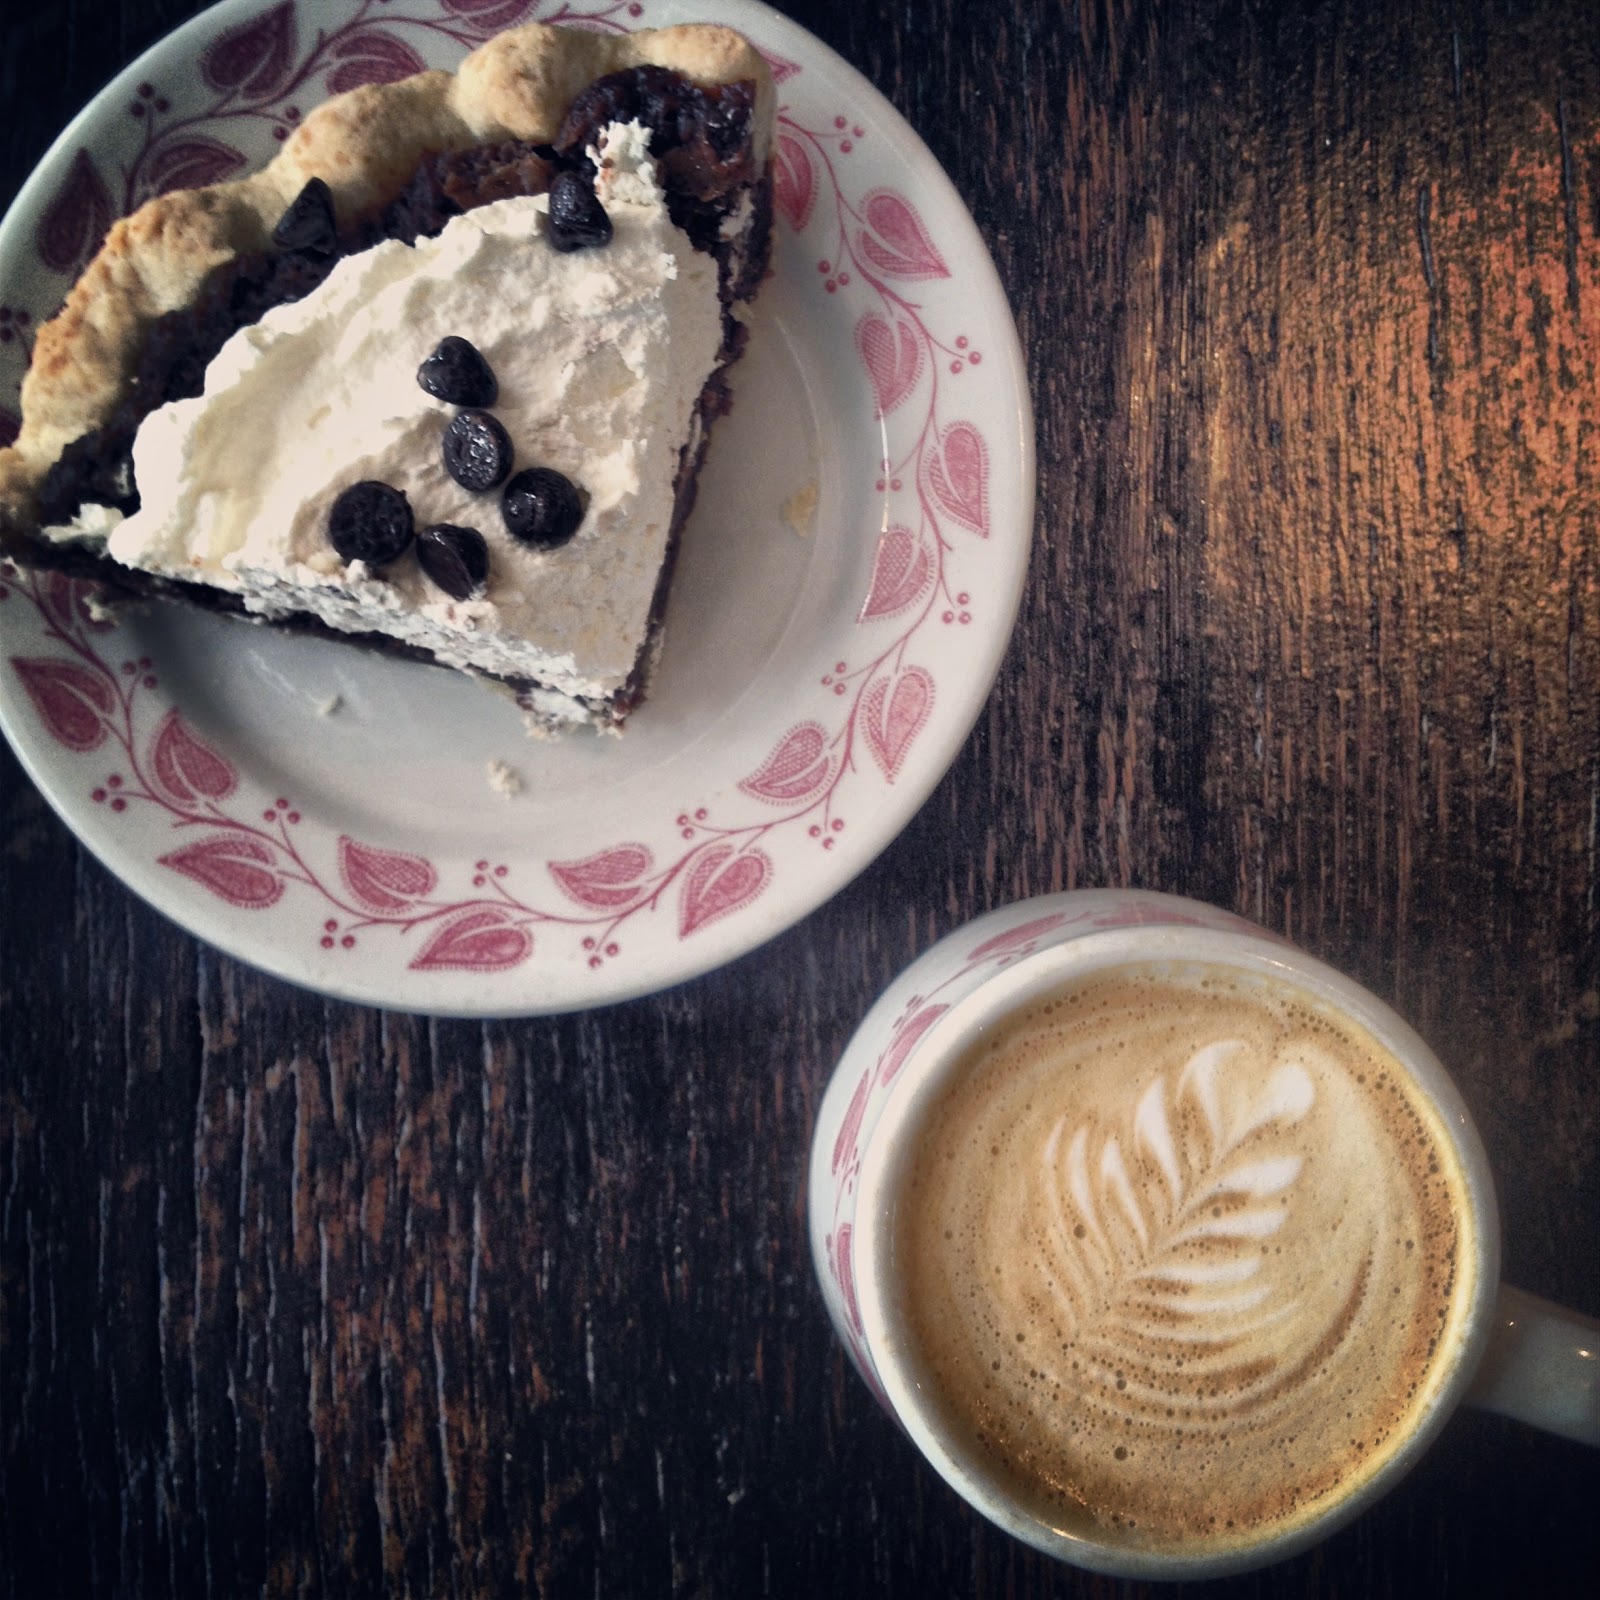
On the hunt for more good coffee and/or cappuccino, I also found The Humble Pie, which is located in the Baker Historic District of the city. In addition to great coffee, they also have some of the best pies around. There are savory and sweet options, so obviously I got one of each.

Feeling inspired by both coffee and pie, I decided to drink a nice cup of joe while scouring my favorite blogs and cookbooks for some pie ideas. I found an herb pie recipe from Jerusalem that looked so good, I just had to make it...even though it's a bit different from the pies that originally inspired me at The Humble Pie.
I hope you like this pick. It reminds me (a bit) of my favorite Moosewood Spanakopita...just with more herbs. 


And here you go...

Herb Pie (adapted slightly from Yotam Ottoleghi and Sami Tamimi's Jerusalem)
Serves 4
This pie can happily sit at the center of a vegetarian meal.
Ingredients
2 tablespoons olive oil, plus extra for brushing the pastry
1 large onion, diced
1 lbs. Swiss chard, stems and leaves finely shredded but kept separate
3-4 stalks celery, thinly sliced
4 scallions (green onion), chopped
1 large bunch fresh spinach (The original recipes uses 1 3/4 ounces of arugula, which I think the British call rocket.)
1 ounce flat-leaf parsley, chopped (I used between 1/2-3/4 cup)
1 ounce fresh mint, chopped (I used between 1/2-3/4 cup)
2/3 ounce dill, chopped (I used about 1/2 cup)
4 ounces of anari or ricotta cheese, crumbled (I used about 3/4 cup of Myzithra)
3 1/2 ounces aged cheddar, grated (I used about 3/4 cup)
2 ounces feta cheese, crumbled (I used about 2 small, but full, handfuls)
the grated zest of 1 lemon
2 medium free-range eggs
1/3 teaspoon salt
1/2 teaspoon coarsely ground black pepper
1/2 teaspoon of superfine sugar
9 ounces filo pastry
Preparation
- Preheat the oven to 400F/200C. Pour the olive oil into a deep frying-pan over medium heat. Add the onion and sauté for 8 minutes without browning. Add the chard stems and the celery and continue cooking for 4 minutes, stirring occasionally. Add the chard leaves, increase the heat to medium-high and stir as you cook for 4 minutes, until the leaves wilt. Add the scallion/green onion, spinach (or arugula) and herbs and cook for 2 minutes more. Remove from the heat and transfer to a colander to cool.
- Once the mixture is cool, squeeze out as much water as you can and transfer to a mixing bowl. (I didn't have much water to drain-- probably because I'm at altitude and the water evaporates more quickly.) Add the three cheeses, lemon zest, eggs, salt, pepper and sugar and mix well.
- Lay out a sheet of filo pastry and brush it with some olive oil. Cover with another sheet and continue in the same manner until you have 5 layers of filo brushed with oil, all covering an area large enough to line the sides and bottom of a 8 1/2-inch pie dish, plus extra to hang over the rim. Line the pie dish with the pastry, fill with the herb mix and fold the excess pastry over the edge of the filling, trimming the pastry as necessary to create a 3/4 inch border.
- Make another set of 5 layers of filo brushed with oil and place them over the pie. Scrunch the pastry a little to create a wavy, uneven top and trim the edges so it just covers the pie. Brush generously with olive oil and bake for 40 minutes, or until the filo turns a nice golden brown. Remove from the oven and serve warm or at room temperature.
* * *
link love...
discovery of the week. and they run a fabulous company.
another new-to-me food blog.
ordered this.
time is up!
building that bridge...
on the book shelf (thanks Jo Ellen for the recommendation).
a fabulous looking winter salad (thanks, Yana).
Please note: These are heart-felt recommendations. I have no business relationship or sponsorship with Novo Coffee, The Humble Pie or any of the links mentioned on this blog.


